

How to weave a reed basket?
How to weave a reed basket? Weaving a reed basket is a satisfying craft that can produce beautiful and functional items.
Here's a basic guide to get you started:
Materials Needed:
- Reeds: You can find reeds at craft stores or online. Commonly used reeds include willow, rattan, or cane.
- Scissors or Pruning Shears: For cutting reeds to size.
- Container of Water: To soak the reeds and make them pliable.
- Cloth or Towel: For drying excess water from the reeds.
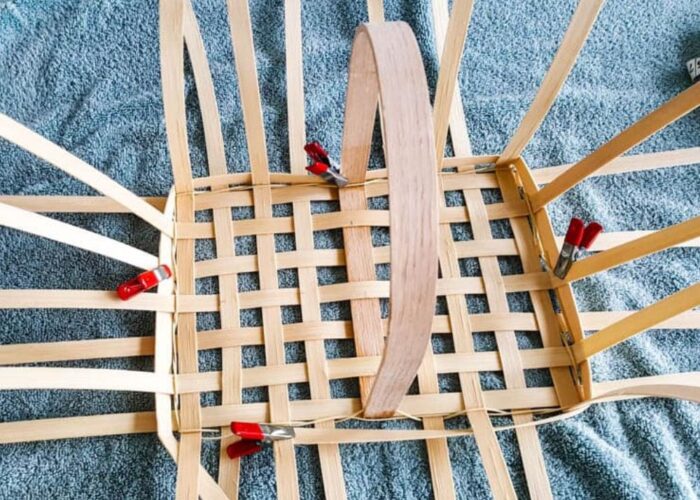
- Optional: Binder clips or clothespins to hold the base together while you're working.
Steps:
- Prepare the Reeds:
- Soak the reeds in water for about 30 minutes to 1 hour until they become pliable. This makes them easier to work with.
- After soaking, lay them out on a towel or cloth to remove excess water.
- Create the Base:
- Start with a few long reeds and lay them out horizontally. These will form the base of your basket.
- Weave additional reeds vertically through the horizontal ones, alternating over and under. This forms a basic lattice pattern.
- Continue weaving until you have a solid base of the desired size. You can use binder clips or clothespins to hold the base together if needed.
- Build the Sides:
- Once the base is complete, begin building up the sides of the basket by bending the reeds upward.
- Weave additional reeds in and out of the vertical reeds, gradually increasing the height of the sides.
- Shape and Design:
- As you continue weaving, you can experiment with different patterns and designs to create the desired look for your basket. Common patterns include twill, checkerboard, or simple braids.
- You can also shape the basket by gradually tapering the sides inwards or outwards as you weave.
- Finishing:
- When you've reached the desired height for your basket, trim any excess reeds and tuck the ends into the weaving to secure them.
- You can add a rim to the top of the basket for a finished look by bending the reeds around the top edge and securing them in place with additional weaving.
- Final Touches:
- Once you're satisfied with the shape and design of your basket, allow it to dry completely. This may take a day or two depending on the type of reeds used.
- If desired, you can add a protective finish such as varnish or wax to the basket to enhance its durability and appearance.
Remember, weaving a reed basket can take time and practice to master, so don't be discouraged if your first attempt isn't perfect. Enjoy the process and have fun experimenting with different techniques and designs!

 Trả lời kèm Trích dẫn